World Map Project, Part I
 The World Map Project
Things are going amazingly well in my site. I know right before I left for home in May, I was having somewhat of a difficult time, but I am SO loving Peace Corps right now! For any of you that will be joining Peace Corps in the future, I'd just like to say that it's SO worth it to get through the bad times (even when you're thinking that there is NO WAY you're going to be able to stay)!
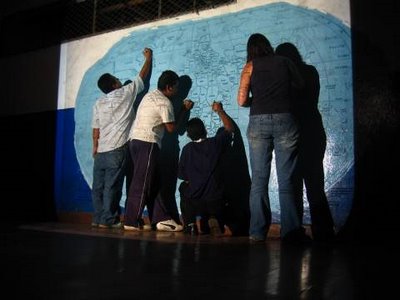
We started a project in the elementary/middle school last week. Actually, I started planning for it about a month ago, but the student involvement started a week ago. We basically made a freaking huge world map on one of the school walls. (Photos of the process so far can be viewed at here.) The kids have been LOVING it! We still have a lot to do, but most of the student participation has finished.
Here is an outline of the process and my little commentary about how it's been going:
1) Clear the wall that you plan to use.
Not too hard. But I was surprised at how many kids wanted all the stuff up on the wall! There were kindergartners crowded around me as I took down the decorations yelling, "Give me the flower! Give me the person! Give me the cloud! Give me the butterfly!" etc. etc.
2) Paint ocean blue in the area where the map will be.
We're using oil-based paint. Painting a large area is not fun. There were about 3 high school students helping with this step. We all had paint remaining on our hands for a couple of days. (YES, we used paint thinner but it didn't do much good...)
3) Draw the map on top of the ocean blue.
We did this at night, 7-9 PM because wee were using a projector and could see the country lines better. This took about 2 hours with 5 of us. Even the school security guard helped out!
4) Paint the countries.
I talked to all the kids ahead of time and had interested students from 3rd-9th grade sign up, and then I assigned each of them an hour to come in and paint a country. (There are 2 sessions, morning and afternoon, of classes each day and each student only attends one of those sessions. So the kids attending the morning session were scheduled for the afternoon and vice versa for the other session. Talk about logistics!) I made one paper for each country that contained the country name in Spanish and in English, the continent where it is located, and the color that the student would use to paint. All of these papers were put into containers, by country color, and each student arrived, signed in, selected their country by randomly pulling out a piece of paper from their selected container. Then they had to find the continent where their country was located on a map, then had to identify the country on the wall map (where they would be painting) and finally after all that went to work painting it. Some kids were SUPER detailed and took like 30 minutes to paint their tiny country, while others just slapped the paint on. All in all, however, it was a really good idea to only allow them to paint 1 country (I did make a few exceptions for kids that chose an island country that was basically just a dot) because they paid more attention to making it look good.
5) Outline the countries.
This is the step we are in now.
6) Write the name of each country.
We are going to number each country and have a list to the right of the map with all the names. This will allow teachers to use the map for exercises and tests later on.
7) Paint shapes to contain world information.
I compiled this info from www.worldatlas.com.
8) Write the world information in the shapes you made in step #7.
9) Paint dark blue (because that is a national color) around the map and world data info.
10) Each student dips his/her hand in a paint color and places his/her hand in the dark blue section.
11) Each student writes his/her name inside his/her hand.
We're on step #5. :) Check back soon for more info!

No comments:
Post a Comment